|
Drawing the Body
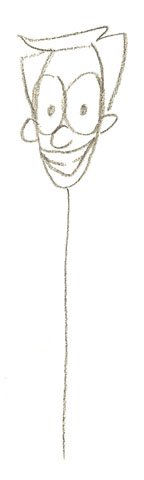
Here in lesson number two, we'll learn how to draw the basic cartoon body, which includes the torso, arms, legs, hands and feet. Not only this, but also drawing the clothing your character wears. The cartoon character's body is very important, because it's the second thing that is noticed. Your character's body must be proportional to its head--meaning, it shouldn't look too small, or too large, but just right, depending on the size of the head. The clothing your character wears is also important, because it will immediately identify what type of person your character is. We'll look at clothing and fashion in more detail later. For now, we just want to look at drawing a basic body. The basic cartoon body is simply made up of lines, circles, and rectangles. It's the skeleton of your character. There are different ways to build your character's skeleton. Some cartoonists use only the stick figure; others use only shapes; still others, like me, use a combination of the two. The best way I've found to draw a cartoon character is to first draw a stick figure, then draw a series of rectangles and circles on top, so I can have a basic idea of the shape of the torso, arms, legs, etc. Remember, these are only the basics. Once you master these steps, you can change them, and use whatever works for you. It's all part of developing your own style! Without further blah-blah, let's draw! 1. Draw a basic head, from
lesson one.
Beneath this,draw a line the basic length of the torso. This includes the neck, chest, and groin area.  2. Draw a short, horizontal line a little way from the chin, and add two circles on either end. This forms the neck and shoulder areas. 
3. Draw a circle at the bottom of the body line. This is hip area, where the legs will be connected. This marks not only where the legs will start, but how big the chest and stomach areas will be. 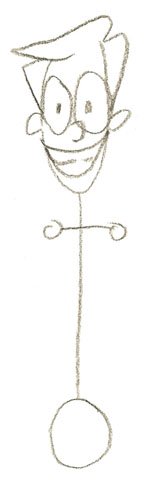
4. Draw lines for the arms, with circles for the elbows and hands. 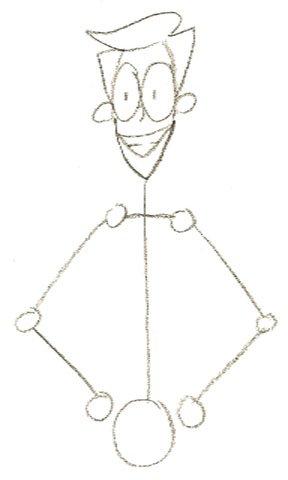
5. Draw lines for legs, and ovals for feet. To appear proportional, legs should be a bit longer than the torso. 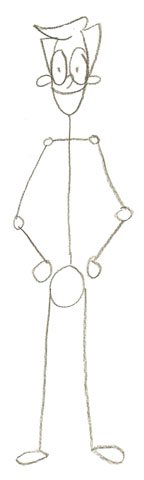
6. I like to flesh out the torso a bit by adding a box around the torso line. 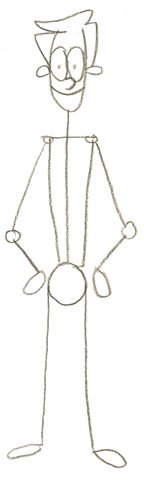
7. Now that you've finished the "skeleton", flesh it out by adding clothes. Also flesh out the neck and hands. 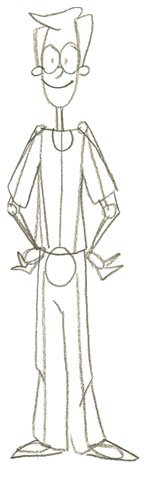
8. Ink your drawing and erase the lines. 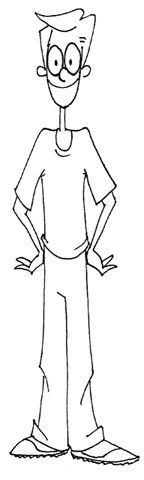
These basic steps can be used to draw men, women, kids, even animals. A good thing to do is to first practice with stick figures. Fill up a few pages making only stick figures in different poses. You can even make stick animals. Once you've mastered the stick figure, the other steps are much easier. Remember, practice makes perfect! For some examples of the different cartoon figures you can draw using these steps, To return to the Drawing Lessons main page, click here
|